Make Your Own Bridal Bouquets
Learning how to make your own bridal bouquets can be fun and actually save money. Flowers are a large part of your wedding budget and can quickly run up a large bill. If you are the actual bride rather than a friend or member of the family, take care to pick and choose what you would like to make, as floral designing can be rather time consuming. You need to have a time management plan for both the fresh flower processing and the actual flower designing so not to stress yourself out right before your wedding day.
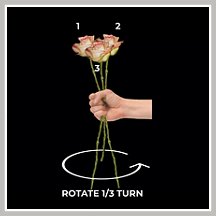
This basic tutorial explains how to make a Spiral hand tied bouquet. A spiral is obtained when crossing the flower stems. This is how the bouquet becomes rounded and has the stems flare out at the bottom. It can be a little tricky, because you have to hold your flowers in one hand while adding each new stem of flower with your free hand, and then rotate the bouquet before adding another stem.
Once complete, this type of hand tied bouquet can actually stand on its own as shown in the photo below.
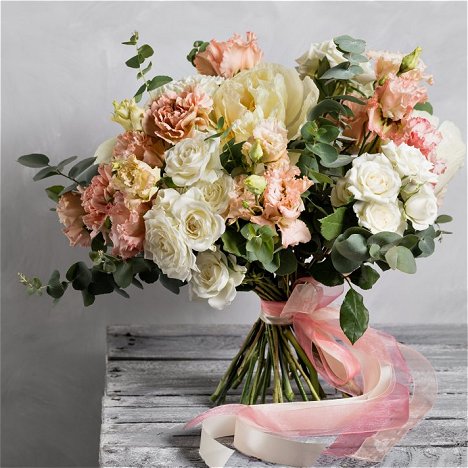
The technique for spiral hand ties is the same whether you are including greenery or different varieties of flowers. The spiral is extremely popular with today's brides and can be finished up with ribbon ties, bows, decorative wire or other finishing decor.
My video tutorial below demonstrates just one of the many tutorials that teach how to make your own bridal bouquets. I have even longer, explicit tutorials for all basic styles of wedding bouquets that show you photo by photo with a full explanation of every step. They include directions for round, crescent, mock hand ties, cascading bouquets, teardrop, free style and arm bouquets.
I suggest you have all your flower varieties laid out on your work table or lined up in vases, which gives you easy access to the next flower or green you need to add after rotating your bouquet.
Start by watching this video tutorial to understand the basic steps of spiral hand tied bouquets:
SPIRAL HAND TIED BASICS

