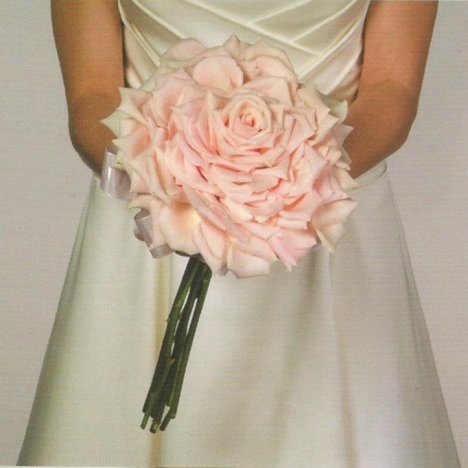
composite flowers
Composite flowers should be constructed on the actual wedding day because of their short life. Be sure to watch the step by step tutorial for the correct technique of wiring the individual petals. Be sure to wash your hands thoroughly and mist your fingers with Finishing Touch before handling the delicate petals. Oils from the skin can cause bruising on delicate flowers.
You'll need the following products and flowers:
- 4 yards sheer pink wired #9 ribbon
- Green Stem Wrap or Bind It tape
- Cardboard Circle (Size depend on your desired size of bouquet.)
- Finishing Touch or Crowning Glory
- Oasis Floral Adhesive
- 2 Green chenille Stems
- 6 Creamy Pink roses
- 15 Galax Leaves or Salal Leaves
Optional:

Cut a circle out of a flat piece of cardboard or foam core board. Cut a hole in the middle for a single rose to go through. (If you need more help on creating a collar from cardboard, check out the English Bouquet Tutorial). Attach two green chenille stems to the center of the cardboard circle.
Glue the galax leaves or the salal leaves to the underside of the collar.
Remove the petals from five roses. Cut 1/4" off the bottom of each petal, which will allow them to lay flat when glued to the cardboard circle.
Apply a thin circle of Oasis Floral Adhesive and a dot to the back of each petal as you glue it. This glue dries too quickly if you smear it over the entire cardboard circle all at once. I advise working around the outer perimeter first, working your way in towards the center hole.
You want the petals to stand up and have depth, so don't try to flatten each petal tightly to the collar. Overlap the petals as you work your way inward. Once you have covered the entire collar, insert a single perfect rose in through the hole in the center. Using the chenille stems you attached to the edges of this center hole, tape (with either green stem tape or the Bind It tape) the chenille stems to the actual rose stem to create a handle. Add in several of the other dethorned rose stems to give you a thicker handle.
Spray the entire arrangement with Finishing Touch or Crowning Glory. Allow to dry. This bouquet must be refrigerated until needed for the ceremony.
